
How to grow bananas: planting, care and harvest
Choose planting material, make room for roots and water, and follow the changing crop through establishment, feeding, leaf trouble and harvest.
A banana plantation asks for attention long before it offers fruit. Small plants must establish, leaves must keep opening, and the ground must carry enough water without holding it indefinitely. The useful question changes with the stage: is this plant settling in, is fresh damage continuing, or is a bunch filling? Alongside examples from our farm, this guide offers ways to check your own crop as those questions change.
In this growing guide
- Begin with the plant you are buying
- Prepare for the wet spell as well as the watering
- Watch how the young plants settle in
- Read below the surface before the next operation
- Build a nutrient plan, then check the actual product
- The October feeding round
- Keep access without damaging the plant
- Separate an old mark from continuing damage
- Change the inspection when the bunch appears
- Plan the journey beyond the cut
Begin with the plant you are buying
Bananas are propagated vegetatively, using suckers or tissue-culture plants. BARC describes tissue culture as a sequence of multiplication, rooting and two stages of hardening before field planting. Hardening is the adjustment from protected production to conditions outside; ask whether it is complete before accepting a delivery. [1]
Keep the cultivar, supplier, batch and health documentation together. Inspect the growing centre, leaves and root ball, and separate visibly damaged or suspect material for assessment. Check each delivery, even when buying tissue-culture plants. Our tissue-culture article follows that earlier nursery journey.
The apparent trunk is a pseudostem: tightly wrapped leaf sheaths rather than wood. It grows from an underground stem, often called the rhizome or corm. New shoots arising from that base are suckers; a selected successor is the follower retained for the next cycle. Each fruiting pseudostem carries a crop once, while new growth from the base can continue the planting. Knowing those parts explains why protecting the roots and choosing followers matter. [11]
Prepare for the wet spell as well as the watering
Start with drainage, soil depth and the water supply. Walk the field after rain if possible: where does water enter, where does it collect, and where can it leave? TNAU identifies well-drained loam as suitable and gives different planting windows and layouts for different land types and cultivars. Those Tamil Nadu calendars are regional examples, not a planting calendar for every Indian farm. [2]
Choose the local planting window with the expected heat, cold and rainfall in view. Mark irrigation and drainage routes before rows occupy the ground. Leave access for inspection, weed work and eventual bunch handling. Check the outlet as carefully as the inlet; a raised planting place cannot remove water from a field with nowhere to discharge it.
Watch how the young plants settle in
At planting, record the date and batch against a simple row map. Wet the root zone appropriately and check whether water actually reaches each plant. TNAU treats planting irrigation separately from later irrigation and varies water supply with crop stage. Its quantities belong to its growing systems; use local soil, weather and delivery measurements to set yours. [2]
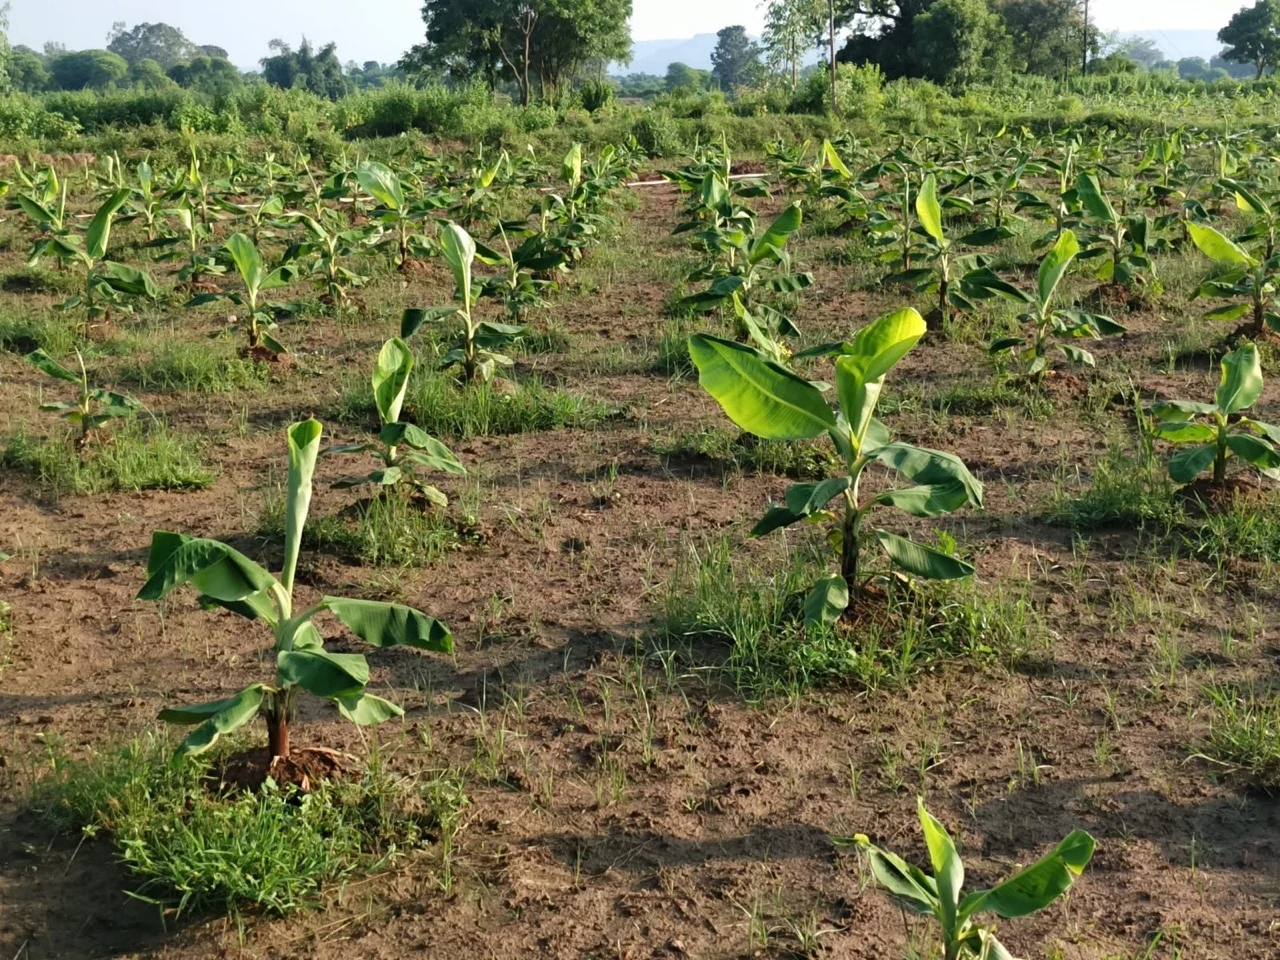
Return to marked plants in a low patch, a drier edge and an ordinary row. Note survival, new leaf opening and any settling or erosion around the root ball. Count gaps before arranging replacements. We planted in July and later replaced some plants. Keep replacement dates on the row map so younger plants can be followed separately.
Read below the surface before the next operation
Banana needs water and a route for excess water to leave. TNAU gives irrigation and root-zone drainage equal attention. A fixed interval misses rain, uneven delivery and differences between soil patches. [3]
Check moisture below the surface near representative plants without cutting major roots. Record recent rain, irrigation duration and where water travelled. Compare the inlet end with the far end of a row. A dry crust can conceal wet soil; a wet surface does not show how evenly the root zone was wetted. Use the following situations to decide which question comes first.
Different conditions, different decisions
Standing water or persistently saturated soil
- Look for
- Map the pooled area, blocked outlets and how long water remains after rain or irrigation.
- Consider the next step
- Restore appropriate drainage and reassess access and planned soil operations before adding more water or fertiliser.
- Return and check
- Revisit the same boundary and plants as water recedes; record new growth and persistent symptoms.
Dryness extends into the root zone
- Look for
- Check delivery at several plants and whether the shortage is local or general.
- Consider the next step
- Check how much water is needed and get it distributed evenly before the next feeding.
- Return and check
- Confirm wetting below the surface and compare the previously dry end of the row.
Moist ground without pooling
- Look for
- Check crop stage, earlier inputs and the next forecast.
- Consider the next step
- Check whether the crop needs nutrients, even when the soil is ready for an application.
- Return and check
- Record subsequent rain and any operation before interpreting growth changes.
Build a nutrient plan, then check the actual product
A feeding programme must account for soil supply, cultivar, stage, organic inputs and earlier applications. TNAU describes nutrient functions and changing leaf patterns, but also supports analytical assessment; a pale leaf needs a closer look before choosing fertiliser. Check whether symptoms track wet ground, dry ground or a particular batch before assuming a shortage. [4]
A bag’s weight and the nutrients it supplies are different quantities. Record the exact bag name, grade, label instructions and method, together with the area or plants actually reached. Check the label for mixing, placement and crop use before applying it. Keep checking roots and drainage even when feeding through the leaves.
The October feeding round
On 13 October 2026, we recorded 100 g of fertiliser product per plant: 40 g urea, 40 g MOP and 20 g APS 20:20:0:13, placed in two side holes. We first called the third product DAP, then corrected it to APS. These amounts describe that round on our farm; choose a feeding plan for your own soil, crop stage and products.
The APS needs a closer check before anyone repeats this mix. IFFCO advises against using its NP(S) 20-20-0-13 on standing crops. We have not confirmed the brand or bag label used here. Check the actual bag’s instructions and get local advice on its suitability before using it in an established banana crop. [5]
By 18 October, the feeding round and earthing-up were complete, with irrigation continuing.
Keep access without damaging the plant
Open ground between young plants makes weeds conspicuous. Check which weeds are returning and where they interfere with the crop or access. KAU advises shallow weed work and avoiding deep digging; after bunching, it advises cutting weeds rather than disturbing the soil. It also distinguishes unwanted suckers from followers retained for the next crop. [6]
Choose the method for the stage and ground conditions. Keep tools clear of the pseudostem and roots. Decide the follower system with local cultivar guidance instead of allowing every shoot to remain or removing every shoot automatically. Earthing-up and weed clearing should leave drainage routes functioning.
Separate an old mark from continuing damage
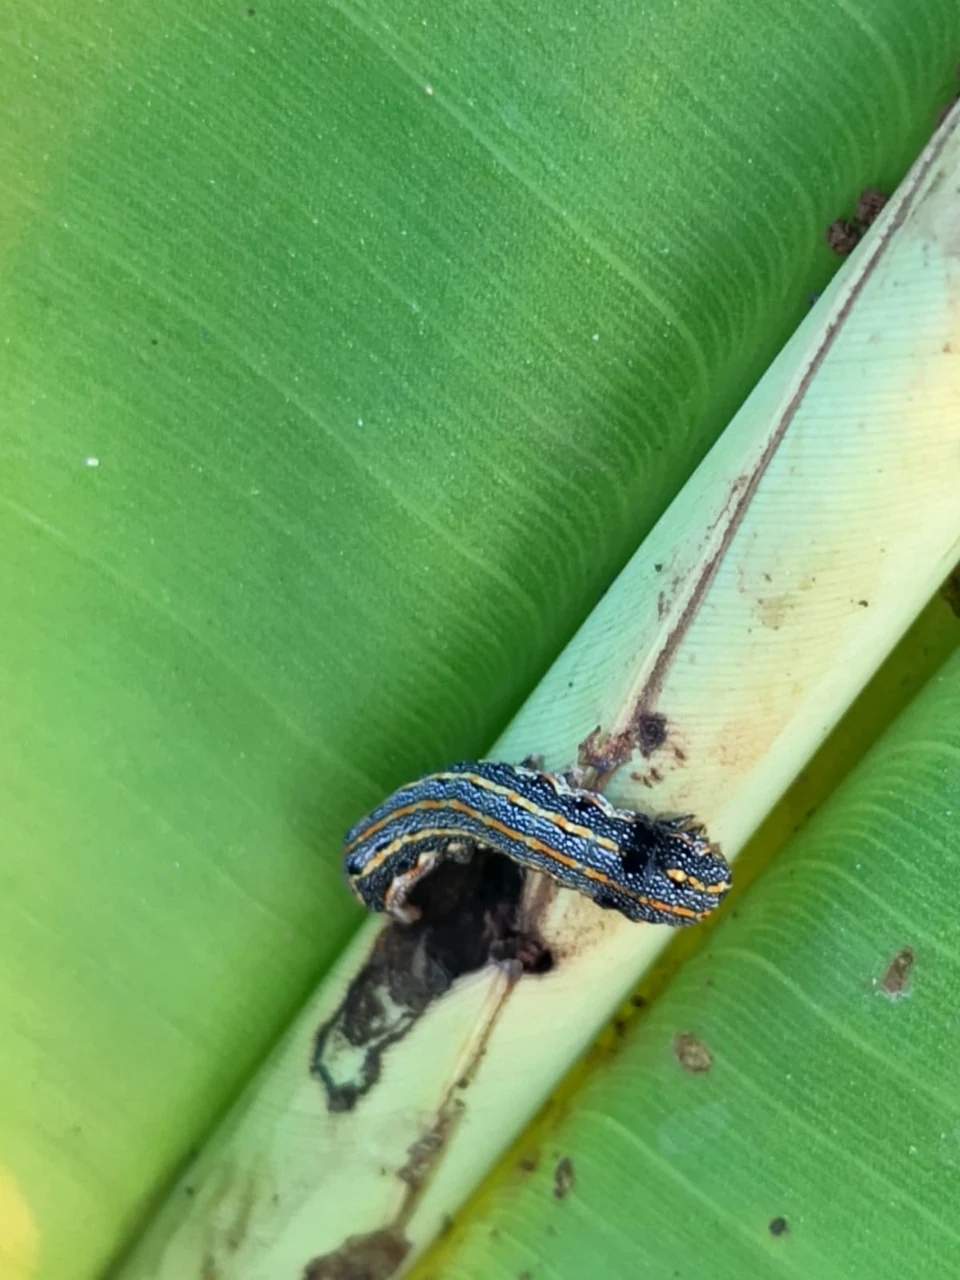
Start with a whole-plant view, then both sides of affected leaves. Record whether the newest leaf is involved, whether marks are expanding, and whether the pattern follows a field edge or wet patch. Look for the insect, fresh feeding and frass rather than naming a pest from a hole. TNAU describes distinct banana leaf feeders and pests of the corm and pseudostem; similar loss of vigour can have different explanations. [7]
An old opening will remain after an insect has gone. Fresh feeding with a live caterpillar asks a different question from an unchanged scar beside a healthy new leaf. Wilting, collapse or damage around the growing centre needs prompt local assessment, with the plant history and photographs. Record the extent and rate of spread before selecting an intervention. Any application must follow the actual product label and locally applicable crop advice. Our leaf-mark article expands the observation process.
Change the inspection when the bunch appears
Record bunch emergence on individual plants. Check leaning plants, exposed bunches and the condition of supporting material. KAU explains that wind can uproot or break bunch-bearing plants and describes propping; it also warns against removing still-green leaves simply because they hang down. Those leaves retain useful photosynthetic area. [6]
Bunch age becomes a useful record, but not an automatic harvest date. KAU describes cultivar and climate differences in the time from bunch emergence to maturity. Follow filling fingers and the condition of the plant alongside the date; a plantation can contain several stages at once. [8]
Plan the journey beyond the cut
Confirm maturity for the cultivar and intended market with local guidance. NHB uses finger filling and roundness among harvest indicators, with maturity at harvest adjusted for the journey. Prepare people, a clear carrying route and padded containers before cutting. Keep bunches from dropping or rubbing and move harvested fruit into shade. [9]
Separate damaged fruit and keep harvest lots identifiable. Decide whether fruit is for nearby use, sale or a controlled ripening and transport system before choosing storage. NRCB’s storage research uses controlled treatments that vary by cultivar. Choose storage suited to your fruit and handling system; colder is not always better. [10]
After harvest, return to the underground base and retained-follower plan, and record damaged fruit, handling losses and unresolved plant-health problems. Those observations make the next cycle more informative than a bare harvest date.
Sources behind this guide
General guidance is drawn from the references below. Farm examples link to their own dated notes.
- BARC · Micropropagation of bananaAccessed 2026-10-29
- TNAU · Banana: soil, regional seasons, establishment and systemsAccessed 2026-10-29
- TNAU · Banana irrigation managementAccessed 2026-10-29
- TNAU · Banana nutrient managementAccessed 2026-10-29
- IFFCO · NP(S) 20-20-0-13: standing-crop-use cautionAccessed 2026-10-29
- KAU · Banana after cultivationAccessed 2026-10-29
- TNAU · Banana crop protectionAccessed 2026-10-29
- KAU · Banana harvesting: maturity varies with cultivar and climateAccessed 2026-10-29
- National Horticulture Board · Banana: harvest and handling principlesAccessed 2026-10-29
- ICAR–NRCB · Post harvest technologyAccessed 2026-10-29
- UF/IFAS · Banana plant structure, suckers and one-crop pseudostemsAccessed 2026-10-29